Showing posts with label crocheted animals. Show all posts

Funmigurumi Blockety Ducky Toy and Baby Rattle

Best Blog Tips


This toy is ideal to decorate a nursery, or if baby already plays with blocks, this one can be a lot of fun since it has feet, wings and a tail, it is also a tactile delight for little ones to explore, add to this the fact that it either rattles or it can be squeezed to hear it squeak, which can bring out all those lovable baby giggles you love to hear. It is relatively easy to make, it has a generous size, and it really cute once it is put together.

Materials: Red Heart worsted weight Bright Yellow yarn (1 skein)
Red Heart worsted weight Pumpkin yarn (scraps)
Red Heart worsted weight Black (scraps)
Red Heart worsted weight White (scraps)
Red Heart worsted weight Petal Pink yarn (scraps)
Crochet hook size G (only for beak and tail)
Crochet hook size H
Crochet hook size F (only for eyes and “pink” of cheeks)
Scissors
Fiberfill
Measuring tape
1 or cat balls with a bell inside (you find those in the pet aisle of your local pet shop or WalMart) or 1 Squeaker.
Blunt needle

Block size: Approx. 5” W x 4-1/2” L.


Alternative Blockety Ducky:
You can stuff Blockety with Fiberfill and bury a squaker inside, instead of using the rattling balls.

Note- Unless F or G hook is specified, use crochet hook size H.

Body Blocks
Block # 1-
With Bright Yellow, ch 18.
Row 1- 1 sc in second ch from hook and in each ch across. (17 sc) Ch 1, turn.
Row 2- 1 sc in each sc across. (17 sc) Ch 1, turn.
Rows 3 to 21- 1 sc in each sc across. (17 sc) Ch 1, turn.
Row 22- 1 sc in each sc around. Fasten off, leaving long tail to sew with.

Block #2- With Bright Yellow, ch 18.
Row 1- 1 sc in second ch from hook and in each ch across. (17 sc) Ch 1, turn.
Row 2- 1 sc in each sc across. (17 sc) Ch 1, turn.
Rows 3 to 21- 1 sc in each sc across. (17 sc) Ch 1, turn.
Row 22- 1 sc in each sc around. Fasten off, weave in tail.

Block # 3- With Bright Yellow, ch 18.
Row 1- 1 sc in second ch from hook and in each ch across. (17 sc) Ch 1, turn.
Row 2- 1 sc in each sc across. (17 sc) Ch 1, turn.
Rows 3 to 21- 1 sc in each sc across. (17 sc) Ch 1, turn.
Row 22- 1 sc in each sc around. Fasten off, leaving long tail to sew with.

Block #4- With Bright Yellow, ch 18.
Row 1- 1 sc in second ch from hook and in each ch across. (17 sc) Ch 1, turn.
Row 2- 1 sc in each sc across. (17 sc) Ch 1, turn.
Rows 3 to 21- 1 sc in each sc across. (17 sc) Ch 1, turn.
Row 22- 1 sc in each sc around. Fasten off, weave in tail.


Block #5- With Bright Yellow, ch 18.
Row 1- 1 sc in second ch from hook and in each ch across. (17 sc) Ch 1, turn.
Row 2- 1 sc in each sc across. (17 sc) Ch 1, turn.
Rows 3 to 21- 1 sc in each sc across. (17 sc) Ch 1, turn.
Row 22- 1 sc in each sc around. Fasten off, weave in tail.

Block #6- With Bright Yellow, ch 18.
Row 1- 1 sc in second ch from hook and in each ch across. (17 sc) Ch 1, turn.
Row 2- 1 sc in each sc across. (17 sc) Ch 1, turn.
Rows 3 to 21- 1 sc in each sc across. (17 sc) Ch 1, turn.
Row 22- 1 sc in each sc around. Fasten off, leaving long tail to sew with.


Wings (make 2)- With H hook and Bright Yellow. Ch 16.
Row 1- 1 sc in second ch from hook and in each ch across. (15 sc.) Ch 1, turn.
Row 2- 1 sc in each sc across. (15 sc) Ch 1, turn.
Rows 3 to 5- 1 sc in each sc across. (15 sc) Ch 1, turn.
Row 6- 1 sc in each sc across. (15 sc) Ch 3, turn.
Row 7- 1 dc in same spot as ch 3, 4 dc in next sc, 2 dc in next sc, ch 1, sl st in next sc, sl st in next sc, 1 hdc and 1 dc in next sc, 4 dc in next sc, 1 dc and 1 hdc in next sc, ch 1, sl st in next sc, sl st in next sc, 1 hdc and 1 dc in next sc, 4 dc in next sc, 1 dc and 1 hdc in next sc, ch 1, sl st in last sc. Fasten off, leaving long tail to sew with.

Feet (Make 4)-
Pieces 1 and 2- With H hook and Pumpkin, ch 10.
Row 1- 1 sc in second ch from hook, 1 sc in each sc across. (9 sc)
Row 2- 1 sc in each sc across. (9 sc) Ch 1, turn.
Row 3- 1 sc in each of first 6 sc, leave last 3 sc unworked. Ch 4, turn.
Row 4- 1 sc in second ch from hook and in each of next 2 ch, 1 sc in each of next 6 sc. (9 sc)
Row 5- 1 sc in each sc across. (9 sc) Ch 1, turn.
Row 6- 1 sc in each sc across. (9 sc) Ch 1, turn.
Row 7- 1 sc in each of first 6 sc, leave last 3 sc unworked. Ch 4, turn.
Row 8- 1 sc in second ch from hook and in each of next 2 ch, 1 sc in each of next 6 sc. (9 sc)
Row 9- 1 sc in each sc across. (9 sc) Fasten off, weave in tail.

Pieces 3 and 4- With H hook and Pumpkin, ch 10.
Row 1- 1 sc in second ch from hook, 1 sc in each sc across. (9 sc)
Row 2- 1 sc in each sc across. (9 sc) Ch 1, turn.
Row 3- 1 sc in each of first 6 sc, leave last 3 sc unworked. Ch 4, turn.
Row 4- 1 sc in second ch from hook and in each of next 2 ch, 1 sc in each of next 6 sc. (9 sc)
Row 5- 1 sc in each sc across. (9 sc) Ch 1, turn.
Row 6- 1 sc in each sc across. (9 sc) Ch 1, turn.
Row 7- 1 sc in each of first 6 sc, leave last 3 sc unworked. Ch 4, turn.
Row 8- 1 sc in second ch from hook and in each of next 2 ch, 1 sc in each of next 6 sc. (9 sc)
Row 9- 1 sc in each sc across. (9 sc) Fasten off, leaving long tail to sew with.

Tail (Make 2 triangles)-
Triangle #1-
With Bright Yellow and G hook, ch 3.
Row 1- 1 sc in third ch from hook, ch 2, turn. (2 sc)
Row 2- 1 sc in second ch from hook and in each of next 2 sc, Ch 2, turn. (3 sc)
Row 3- 1 sc in second ch from hook, 1 sc in each of next 3 sc. (4 sc) Ch 2, turn.
Row 4- 1 sc in second ch from hook, 2 sc in next sc, 1 sc in each of next sc across. (6 sc) Ch 2, turn.
Row 5- 1 sc in 1 sc in second ch from hook, 2 sc in next sc, 1 sc in each of next 2 sc, 2 sc in next sc, 1 sc in each sc to end of row. (9 sc)
Row 6- 1 sc in each sc across. (9 sc) Fasten off, weave in tail.
Triangle #2- With Bright Yellow and G hook, ch 3.
Row 1- 1 sc in third ch from hook, ch 2, turn. (2 sc)
Row 2- 1 sc in second ch from hook and in each of next 2 sc, Ch 2, turn. (3 sc)
Row 3- 1 sc in second ch from hook, 1 sc in each of next 3 sc. (4 sc) Ch 2, turn.
Row 4- 1 sc in second ch from hook, 2 sc in next sc, 1 sc in each of next sc across. (6 sc) Ch 2, turn.
Row 5- 1 sc in 1 sc in second ch from hook, 2 sc in next sc, 1 sc in each of next 2 sc, 2 sc in next sc, 1 sc in each sc to end of row. (9 sc)
Row 6- 1 sc in each sc across. (9 sc) Fasten off, leaving long tail to sew with.

Sew sides of triangle #1 to Triangle #2, leaving flat bottom open on both triangles (base of triangle.) Stuff lightly with fiberfill.)

Beak: With Pumpking and G hook, ch 10.
Rnd 1- 1 sc in 2nd ch from hk and all across. Working in opposite side across foundation loops of beginning chain, make 1 sc per loop. Sl st to join rnd. (18 sc)
Rnd 2- 1 sc in each sc around. (18 sc)
Rnd 3- Rep row 2. (18 sc)
Rows 3-5: Rep row 2. (18 sc)
Row 6- This time you will only work on the top of the beak. Slip st in first st, 1 sc in each of next 8 sc, sl st in next sc. Fasten off, leaving long tail to sew with. With a little Black, embroider nostrils on top of beak to give Blockety Ducky a more duck-like look. Fasten off, weave in tail.

“Pink” of Cheeks- With Petal Pink and F hk, ch 2.
Rnd 1- Work 6 sc in second ch from hook.
Rnd 2- Make 2 sc in each sc around. Fasten off Petal Pink leaving long tail to sew with.
Pin these two rounds on both sides of beak, and threading blunt needle with leftover yarn, sew in place. Fasten off, weave in tail.

Blockety Ducky’s Eyes (make 2):


With black and F hook, ch 2.
Rnd 1- 6 sc in 2nd ch from hook. Fasten off, leaving a long tail to sew with.
Half rnd 2- Join White. Working in back loops only, make 2 sc in each of first 3 sc, sl st in next sc, Fasten off, leaving long tail to sew with.

Putting Blockety Ducky Together:
Stuff the beak with fiberfill. Take the block that will correspond to Blockety Ducky’s face, turn it so that the stripes of the sc rows will run vertically, and measure it with measuring tape, center the beak, pin down. Thread blunt needle and sew all around. Fasten off, weave in tail. Pin eyes on top of beak and sew in place.
Fasten off and weave tail. Pin “pink” of cheeks in place beside the beak and sew in place. Fasten off. (Face done.) Set aside.
Take the first block that will correspond to one of the sides, turn it so that the sc rows will run vertically and sew the wing right about the middle of it (measure so that both wings will be at the same level), repeat with the block that will correspond to the other side of block. Fasten off, weave in tails. Take square that corresponds to back of Blockety Ducky, turn so that sc rows run vertically, and center tail on lover part of that square, pin and sew in place. Fasten off, weave in tail.
Sew two pieces together for each foot. Barely stuff it so that the foot will still be somewhat flat. Close the foot entirely. Fasten off, weave in tail. Repeat with the other foot.
Sew the face block to the side blocks (the ones with the wings. Fasten off, weave in tails. Sew the bak block that has the tail to these three blocks. Fasten off, weave in tail. Sew the bottom block to all the blocks you have already joined. Fasten off, weave in tail. Decide if your Blockety will rattle or if it will be squeezed to hear it squeak, and as you stuff with fiberfill and bury into Blockety either one or two cat balls or a squaker. Sew top block and fasten off.
Note 2- If you have chosen to stuff the toy and insert a squaker, the ducky will squeak when you squeeze the block, and it is a totally different effect than you get with the rattling ball inside.

You can find very affordable squeakers (believe it or not, at dog toy supplies like Sitstay.com ---Not associated in any way with us. Or in any place that sells grunters and squakers for stuffed dog toys.)

You're done!

............
Alone in the Crowd

Heiferetta Moolove

Best Blog Tips


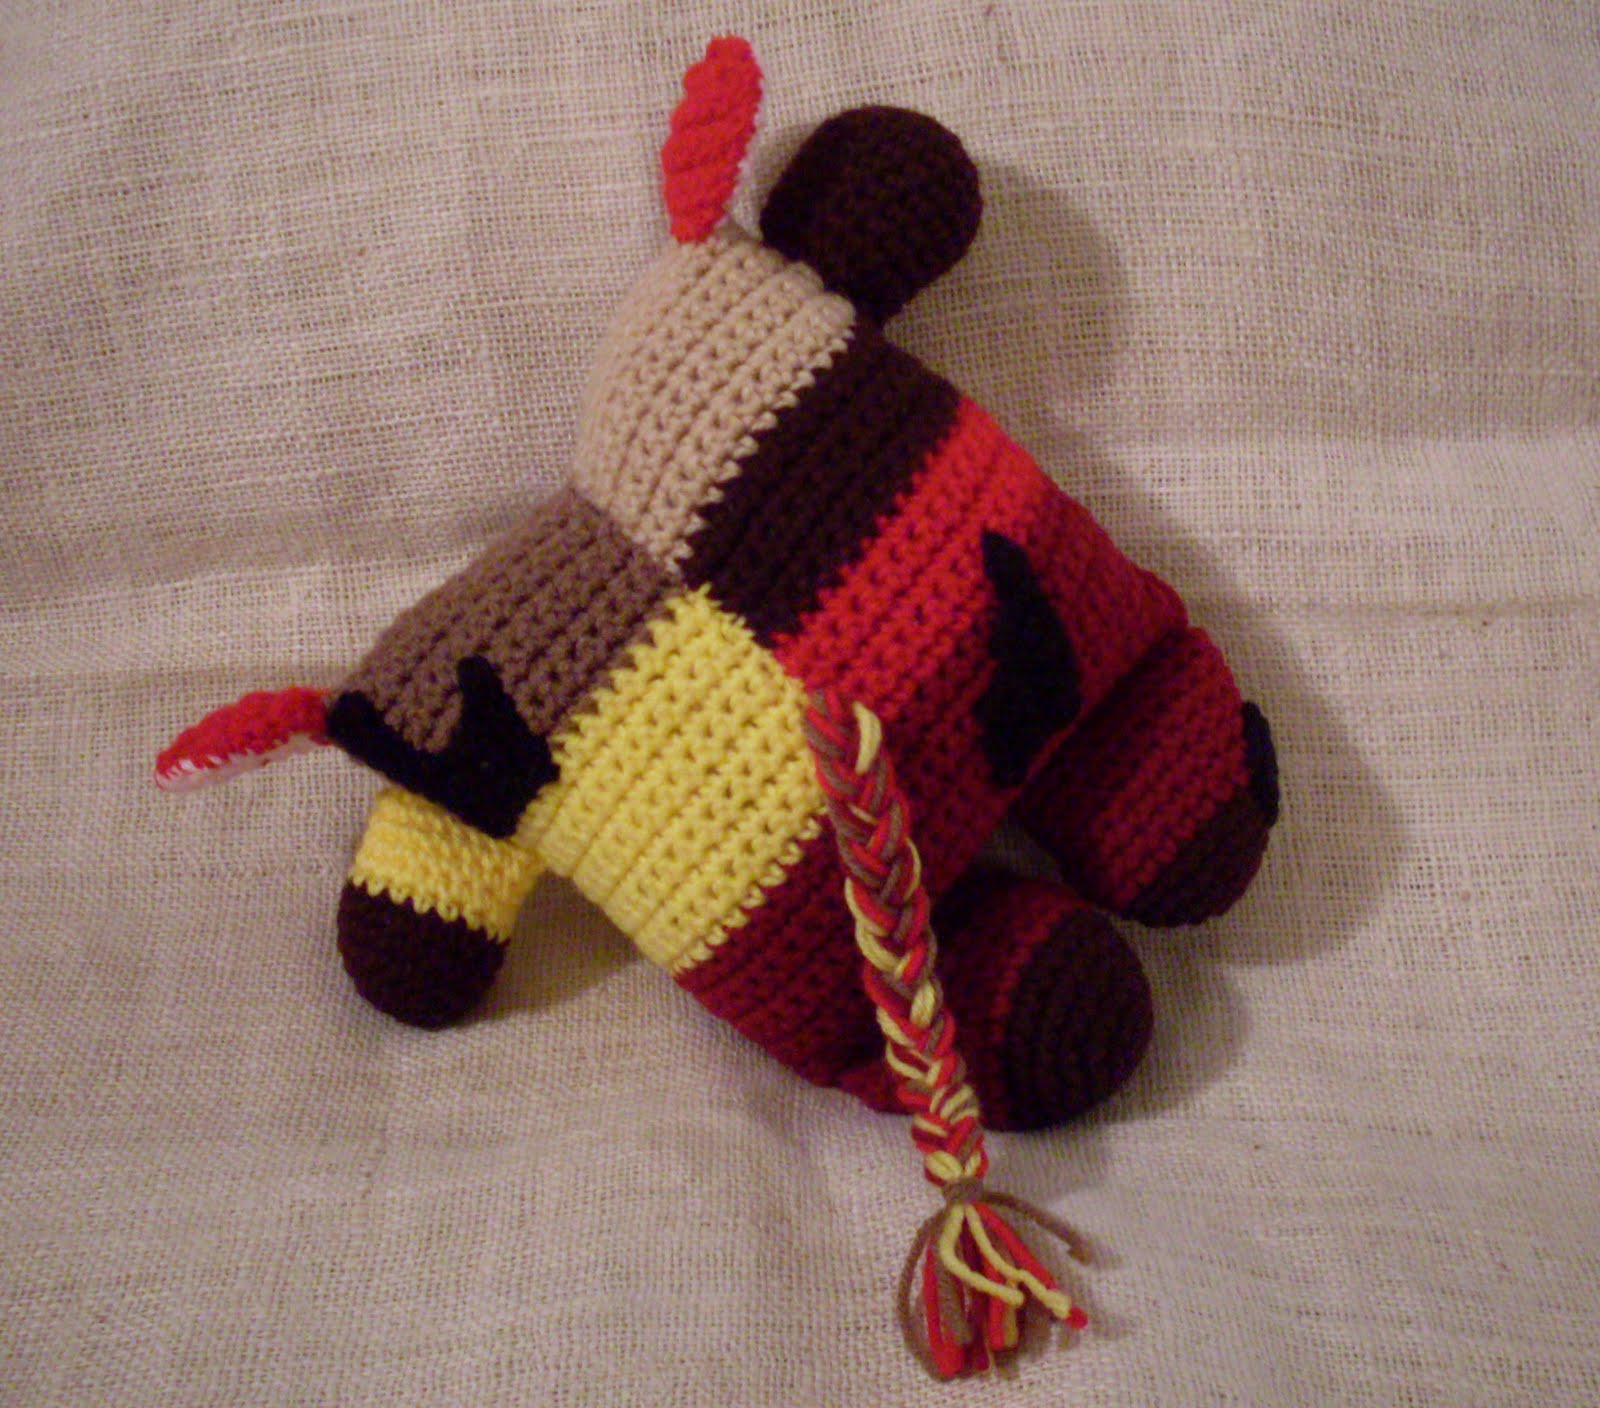
Heiferetta is the newest baby in the Moolove family and the last little cow we will make (for the time being). . .it's been fun making these barnyard friends, but we would like to move on to other pastures too. So here's the little cowly babe, fresh from the nursery! A cute little heifer in the making and the joy of her older brother Hoofer. (By the way, I desperately need to stop making cows because my love of color is showing up too much and coming up out of their ears. If I don't stop, in no time at all we would be making blue cows with green muzzles and pink spots!)
Hope you enjoy making this one!

Materials:
Red Heart worsted weight yarn Burgundy (scraps)
Red Heart worsted weight yarn Cherry Red (scraps)
Red Heart worsted weight yarn Bright Yellow (scraps)
Red Heart worsted weight yarn Coffee (scraps)
Red Heart worsted weight yarn Coffee Buff (scraps)
Red Heart worsted weight yarn Café (scraps)
Red Heart worsted weight yarn Aran (scraps)
Fiberfill
Crochet hook size H
Scissors
Blunt needle
Measuring tape
Pins
Body-
Front-
With Burgundy, ch 31.
Row 1- 1 sc in third ch from hook and in each ch across. (30 sc)
Row 2- 1 sc in each sc across. Ch 1, turn. (30 sc)
Rows 3 to 9- Rep row 2. Ch 1, turn. (30 sc)
Row 10- 1 sc in each sc across. Fasten off, leaving long tail to sew with.
(Side #1) Half row 11- With Bright Yellow, 1 sc in each of first 15 sc, ch 1, turn.
Half row 12- 1 sc in each sc across. (15 sc) Ch 1, turn.
Rows 13 to 19- 1 sc in each sc across. (15 sc) Ch 1, turn.
Row 20- 1 sc in each sc across. (15 sc) Fasten off Bright Yellow, leaving long tail to sew with.
Row 21- Join Café. Make 1 sc in each sc across. (15 sc) Ch 1, turn.
Rows 22 to 29- 1 sc in each sc across. (15 sc) Ch 1, turn.
Row 30- 1 sc in each sc across. (15 sc) Fasten off Café, leaving long tail to sew with.

(Side #2) Half Row 11- Join Cherry Red. Work 1 sc in each remaining sc across. (15 sc) Ch 1, turn.
Half Rows 12 to 14- 1 sc in each sc across. (15 sc) Ch 1, turn.
Half Row 15- 1 sc in each sc across. (15 sc) Fasten off Cherry red, leaving long tail to sew with.
Half Row 16- Join Coffee. Work 1 sc in each sc across. (15 sc) Ch 1, turn.
Half Rows 17 to 19- 1 sc in each sc across. (15 sc) Ch 1, turn.
Half Row 20- 1 sc in each sc across. (15 sc) Fasten off Coffee, leaving long tail to sew with.
Half Row 21- Join Buff. Make 1 sc in each sc across. (15 sc) Ch 1, turn.
Half Rows 22 to 29- 1 sc in each sc across. (15 sc) Ch 1, turn.
Half Row 30- 1 sc in each sc across. Fasten off Buff, leaving long tail to sew with.
Thread blunt needle with appropriate color tails and sew center of Body Front, fasten off, weave in ends. Rep all rows for Body Back.
Legs-
Leg #1-
With Coffee, ch 2.
Rnd 1- 6 sc in second ch from hook, sl st to join rnd. (6 sc)
Rnd 2- 2 sc in each sc around. (12 sc)
Rnd 3- 1 sc in first sc, 2 sc in next sc, *1 sc in next sc, 2 sc in next sc, rep from * around. (18 sc)
Rnds 4- 1 sc in each of first 2 sc, 2 sc in next sc, rep around. (24 sc)
Rnd 5- 1 sc in each sc around. (24 sc)
Rnd 6- 1 sc in each sc around. Fasten off Coffee, weave in tail. (24 sc)
Rnd 7- Join Burgundy, work 1 sc in each sc around. (24 sc)
Rnd 8- 1 sc in each sc around. (24 sc)
Rnd 9- 1 sc in each sc around. (24 sc) Fasten off Burgundy, weave in tail.
Rnd 10- Join Claret. Work 1 sc in each sc around. (24 sc)
Rnd 11- 1 sc in each sc around. Fasten off Claret, weave in tail. (24 sc)
Rnd 12- Join Burgundy. Work 1 sc in each sc around. (24 sc)
Rnd 13- 1 sc in each sc around. Fasten off Burgundy, leaving long tail to sew with. (24 sc)
Leg #2-
Rnd 1- 6 sc in second ch from hook, sl st to join rnd. (6 sc)
Rnd 2- 2 sc in each sc around. (12 sc)
Rnd 3- 1 sc in first sc, 2 sc in next sc, *1 sc in next sc, 2 sc in next sc, rep from * around. (18 sc)
Rnds 4- 1 sc in each of first 2 sc, 2 sc in next sc, rep around. (24 sc)
Rnd 5- 1 sc in each sc around. (24 sc)
Rnd 6- 1 sc in each sc around. Fasten off Coffee, weave in tail. (24 sc)
Rnd 7- Join Burgundy, work 1 sc in each sc around. (24 sc)
Rnds 8 to 12- 1 sc in each sc around. (24 sc)
Rnd 13- 1 sc in each sc around. Fasten off Burgundy, leaving long tail to sew with.
Arms
Arm #1-
With Coffee, ch 2.
Rnd 1- 6 sc in second ch from hook, sl st to join rnd. (6 sc)
Rnd 2- 2 sc in each sc around. (12 sc)
Rnd 3- 1 sc in first sc, 2 sc in next sc, *1 sc in next sc, 2 sc in next sc, rep from * around. (18 sc)
Rnds 4 to 5- 1 sc in each sc around. (18 sc)
Rnd 6- 1 sc in each sc around. (18 sc)
Rnds 7 to 10- 1 sc in each sc around. (18 sc)
Rnd 11- 1 sc in each sc around. Fasten off Coffee, leaving long tail to sew with. (18sc)

Arm #2-
With Coffee, ch 2.
Rnd 1- 6 sc in second ch from hook, sl st to join rnd. (6 sc)
Rnd 2- 2 sc in each sc around. (12 sc)
Rnd 3- 1 sc in first sc, 2 sc in next sc, *1 sc in next sc, 2 sc in next sc, rep from * around. (18 sc)
Rnds 4 to 5- 1 sc in each sc around. (18 sc)
Rnd 6- 1 sc in each sc around. Fasten off Coffee, weave in end. (18 sc)
Rnd 7- Join Bright Yellow. Work 1 sc in each sc around. (18 sc)
Rnds 8 to 10- 1 sc in each sc around. (18 sc)
Rnd 11- 1 sc in each sc around. Fasten off Bright Yellow, leaving long tail to sew with.

Stuff arms with fiberfill. Pin and sew in place as seen in photos. Fasten off, weave in tail.
Thread blunt needle with appropriate color yarn and close bottom of Body. Fasten off, weave in ends.
Stuff legs and sew in place following photos. Fasten off, weave in tail.

Tail-
Measure and cut the following strands of yarn, 24 inches long each:
2 Burgundy
2 Bright Yellow
2 Café
2 Cherry Red
Fold strands in half, trying to match the ends, divide in 3 sections and braid. Cut a piece of yarn in Café, and wrap it several times around the end of the braid, tie firmly at the back of the braid. Trim, leaving as little tassel at the end of the braid. Measure back and find the center. Thread a blunt needle with Café and after centering tail, sew in place. Fasten off and weave in ends.

Spots-
Spot #1-
With Black, ch 2.
Rnd 1- 8 sc in second ch from hook, sl st to join rnd. (8 sc)
Rnd 2- 2 sc in each sc around. (16 sc) Fasten off, leaving long tail to sew with.

Spot #2-
With Black, ch 7.
Row 1- 1 sc in third ch from hook and in each ch across. (6 sc) Ch 1, turn.
Row 2- 1 sc in each of first 4 sc, ch 1, turn, leaving last 2 sc unworked. (4 sc)
Rows 3 to 4- 1 sc in each sc across. Ch 6, turn.
Row 5- 1 sc in third ch from hook and in each ch and sc across. (9 sc) Ch 1, turn.
Row 6- 1 sc in each sc across. (9 sc) Fasten off, leaving long tail to sew with.
Spot #3-
With Black, ch 10.
Row 1- 1 sc in third ch from hook and in each ch across. (9 sc) Ch 1, turn.
Row 2- 1 sc in each of first 6 sc, ch 1, turn. Leave rest of row unworked. (6 sc)
Row 3- 1 sc in each of first 4 sc, ch 1, turn, leaving last 2 sc unworked. (4 sc)
Row 4- 1 sc in each sc across. (4 sc) Fasten off, leaving long tail to sew with.

Spot #4-


With Black, ch 2.
Rnd 1- 6 sc, in second ch from hk, sl st to join rnd. Rnd 2- 2 sc in each of first 3 sc, sl st in next sc. (6 sc)
Semi-rnd 3- Ch 1, 2 sc in each of next 6 sc. (12 sc) Sl st in next sc. Fasten off, leaving long tail to sew with.
Guiding yourself by the photos, pin and sew spots in place. Fasten off, weave in tail.
Muzzle-
With Aran, ch 2.
Rnd 1- 6 sc in second ch from hook. Sl st to join rnd. (6 sc)
Rnd 2- 2 sc in each sc around. (12 sc)
Rnd 3- 1 sc in first sc, 2 sc in next sc, rep around. (18 sc)
Rnd 4- 2 sc in each of first 2 sc, 2 sc in next sc, rep around. (24 sc)
Rnd 5- 1 sc in each of first 3 sc, 2 sc in next sc, rep around. (32 sc)
Rnd 6- 1 sc in each sc around. (32 sc)
Rnd 7- 1 sc in each sc around. (32 sc)

Mouth-
With black, embroider mouth as seen in photos. Fasten off, weave in tail.

Nostrils-
Thread a blunt needle with Black and embroider nostrils on muzzle. Fasten off. Weave in tails.
Stuff muzzle and measure Front. Center muzzle and pin. Thread blunt needl with leftover tail and sew all around. Fasten off, weave in tail.
Measure Front and center Muzzle. Stuff and pin in place. Thread blunt needle with leftover tail and sew Muzzle in place. Fasten off, weave in tail. Eyes- (Make 2)
With Black, ch 2.
Rnd 1- Work 6 sc in second ch from hk and sl st to join rnd. Fasten off Black, leaving long tail to sew with.
Semi-rnd 2- Join Coffee. Make 2 sc in each of first 3 sc, sl st in next sc. Fasten off, leaving long tail to sew with.
Sew eyes in place on top of muzzle as seen in photos. Fasten off, weave in tail.
Ears
Upper Side of Ear (Make 2)-
With Cherry Red, ch 7.
Row 1- 1 sc in second ch from hook and in each ch across. (6 sc) Ch 1, turn.
Row 2- 2 sc in first sc, 1 sc in each sc till last sc, 2 sc in last sc. (8 sc)
Row 3- 2 sc in first sc, 1 sc in each sc till last sc, 2 sc in last sc. (10 sc)
Rows 4 to 6- 1 sc in each sc across. (10 sc)
Row 7- Sc2tog over first 2 sc, 1 sc in each of next 2 sc, sc2tog over next 2 sc, 1 sc in each of next 2 sc, sc2tog over last 2 sc. (7 sc)
Row 8- Sc2tog over first 2 sc, 1 sc in each of next 3 sc, sc2tog over last 2 sc. (5 sc)
Row 9- Sc2tog over first 2 sc, 1 sc in next sc, sc2tog over last 2 sc. Fasten off, leaving long tail to sew with. (3 sc)

Underside of Ear (Make 2)-
With Petal Pink, repeat rows 1 to 9 as for the Upper Side of Ear. Fasten off, weave in tail.
Put one piece of Upper Side with One Piece of Underside of Ear together and using leftover tail sew all around, leaving a space open to insert on the corner of Heiferetta’s square head. Insert ear and finish attaching. Fasten off, weave in tail.

Note- Because of the thickness of Cherry Red, the Underside of Ear will be slightly smaller than the upper side of the Ear. It will make the ear curl a bit which will work to make it look more natural, so don’t worry about it!

Done!
.................................

Less than 2 minutes to read and it will brighten your day!
Be Not Discouraged


Cowletta Moolove Funmigurumi

Best Blog Tips


With Cowletta, we will start a new family of Funmigurumi, the Moolove family, straight out of a green and pretty prairie!
The idea for this funmigurumi came from a personal request from a special crocheter, but it just stirred up things on the farm, so Cowletta wound up having a sister, her name is Milketta. I hear some mooing coming from the pasture so I don’t know if there are more little cows out there or may even a couple of bulls. . . Meantime, enjoy Cowletta until we find out!


Crochet skill: Advanced beginner to intermediate

Size: 10 “ long x 9” wide

Materials:
Red Heart worsted weight yarn Burgundy (scraps)
Red Heart worsted weight yarn Buff (scraps)
Red Heart worsted weight yarn Carrot (scraps)
Red Heart worsted weight yarn Claret (scraps)
Red Heart worsted weight yarn Black (scraps)
Red Heart worsted weight yarn Petal Pink (scraps)
Fiberfill
Crochet hook size H
Scissors
Blunt needle
Measuring tape


Body
Side #1 (Make 2)

With Burgundy, ch 16.
Row 1- 1 sc in 3rd ch from hook and in each ch across. (15 sc) Ch 1, turn.
Row 2- 1 sc in each sc across. Ch 1, turn. (15 sc)
Rows 3 to 14- Rep row 2. (15 sc)
Row 15- 1 sc in each sc across. Fasten off Burgundy. Leave long tail to sew with. (15 sc)
Row 16- Join Buff. Work 1 sc in each sc across. (15 sc) Ch 1, turn.
Row 17- 1 sc in each sc across. (15 sc) Ch 1, turn.
Rows 18 to 29- Rep row 17.
Row 30- 1 sc in each sc across. Fasten off, leaving long tail to sew with. (15 sc)


Side #2 (Make 2)

With Claret, ch 16.
Row 1- 1 sc in 3rd ch from hook and in each ch across. (15 sc) Ch 1, turn.
Row 2- 1 sc in each sc across. Ch 1, turn. (15 sc)
Rows 3 to 14- Rep row 2. (15 sc)
Row 15- 1 sc in each sc across. Fasten off Claret. Leave long tail to sew with. (15 sc)
Row 16- Join Carrot. Work 1 sc in each sc across. (15 sc) Ch 1, turn.
Row 17- 1 sc in each sc across. (15 sc) Ch 1, turn.
Rows 18 to 29- Rep row 17.
Row 30- 1 sc in each sc across. Fasten off, leaving long tail to sew with. (15 sc)

Place 1 piece of Body side #1 and 1 piece of Body side # 2 together, right sides facing,and threading a blunt needle with the tails left after fastening off, sew the pieces down the middle to join them. Repeat for the back side.
Now, placing both Back and Front of Body with both right sides facing, thread blunt needle with yarn of appropriate colors and sew sides and bottom of Body. Fasten off. Turn inside out and put aside.

Legs-
Leg # 1-
With Black, ch 2.
Rnd 1- Make 6 sc in second ch from hook and sl st to join rnd. (6 sc)
Rnd 2- 2 sc in each sc around. (12 sc)
Rnd 3- 1 sc in first sc, 2 sc in next sc, rep around. (18 sc)
Rnd 4- 1 sc in each of first 2 sc, 2 sc in next sc, rep around. (24 sc)
Rnd 5- 1 sc in each sc around. (24 sc)
Rnd 6- 1 sc in each sc around. (24 sc) Fasten off Black and weave in ends.
Rnd 7- Join Burgundy. Make 1 sc in each sc around. (24 sc)
Rnds 8 to 12- 1 sc in each sc around. (24 sc)
Rnd 13- 1 sc in each sc around. Fasten off Burgundy, leaving long tail to sew with.

Leg #2-
With Black, ch 2.
Rnd 1- Make 6 sc in second ch from hook and sl st to join rnd. (6 sc)
Rnd 2- 2 sc in each sc around. (12 sc)
Rnd 3- 1 sc in first sc, 2 sc in next sc, rep around. (18 sc)
Rnd 4- 1 sc in each of first 2 sc, 2 sc in next sc, rep around. (24 sc)
Rnd 5- 1 sc in each sc around. (24 sc)
Rnd 6- 1 sc in each sc around. (24 sc) Fasten off Black and weave in ends.
Rnd 7- Join Buff. Make 1 sc in each sc around. (24 sc)
Rnds 8 to 9- 1 sc in each sc around. (24 sc) Fasten off Buff, weave in ends.
Rnd 10- Join Claret. Work 1 sc in each sc around. (24 sc)
Rnds 11 to 12- 1 sc in each sc around. (24 sc)
Rnd 13- 1 sc in each sc around. Fasten off Claret, leaving long tail to sew with.

Arm # 1-
With Black, ch 2.
Rnd 1- Make 6 sc in second ch from hook and sl st to join rnd. (6 sc)
Rnd 2- 2 sc in each sc around. (12 sc)
Rnd 3- 1 sc in first sc, 2 sc in next sc, rep around. (18 sc)
Rnd 4- Work 1 sc in each sc around. (18 sc)
Rnd 5- 1 sc in each sc around. (18 sc)
Rnd 6- 1 sc in each sc around. (18 sc) Fasten off Black, weave in tail.
Rnd 7- Join Burgundy. Make 1 sc in each sc around. (18 sc)
Rnd 8- 1 sc in each sc around. (18 sc)
Rnd 9- 1 sc in each sc around. (18 sc) Fasten off Burgundy, weave in tail.
Rnd 10- Join Buff. Work 1 sc in each sc around. (18 sc)
Rnd 11- 1 sc in each sc around. (18 sc) Fasten off Bluff, weave in tail

Arm # 2-
With Black, ch 2.
Rnd 1- Make 6 sc in second ch from hook and sl st to join rnd. (6 sc)
Rnd 2- 2 sc in each sc around. (12 sc)
Rnd 3- 1 sc in first sc, 2 sc in next sc, rep around. (18 sc)
Rnd 4- Work 1 sc in each sc around. (18 sc)
Rnd 5- 1 sc in each sc around. (18 sc)
Rnd 6- 1 sc in each sc around. (18 sc) Fasten off Black, weave in tail
Rnd 7- Join Carrot. Make 1 sc in each sc around. (18 sc)
Rnds 8 to 10- 1 sc in each sc around. (24 sc)
Rnd 11- 1 sc in each sc around. (18 sc) Fasten off Carrot, leaving long tail to sew with.

Stuff arms and sew to sides of body, making sure they are at the same level. Fasten off, weave in tail.


Eyes (Make 2)-

With Black, ch 2.
Row 1- Work 6 sc in 2nd ch from hook. DO NOT JOIN INTO A ROUND. Ch 1, turn. (6 sc)
Row 2- 1 sc in each sc across. (6 sc) Fasten off, leaving long tail to sew with and to make eyelashes.

Muzzle-


With Petal Pink, ch 6.
Rnd 1- 1 sc in 2nd ch from hook and in each ch across till last ch. 2 sc in last ch,
working now on foundation loops of beginning chain, 1 sc in each loop till last loop, 2 sc in last loop, cl st to join rnd. (13 sc)
Rnd 2- 2 sc in first sc, 1 sc in each of next 2 sc, 2 sc in next sc, 1 sc in next sc, 2 sc in each of next 2 sc, 1 sc in next sc, 2 sc in next sc, 1 sc in next sc, 2 sc in next sc, 2 sc in last sc. (20 sc)
Rnd 3- 1 sc in each of first 6 sc, 2 sc in next sc, 1 sc in each of next 5 sc, 2 sc in next sc, 1 sc in each of last 7 sc. (22 sc)
Rnd 4- 1 sc in each of first 4 sc, 2 sc in next sc, 1 sc in each of next 7 sc, 2 sc in next sc, 1 sc in each sc till end of rnd. (24 sc)
Rnd 5- 1 sc in each of first 6 sc, 2 sc in next sc, 1 sc in each of next 9 sc, 2 sc in next sc, 1 sc in each of last 7 sc. (26 sc)
Rnd 6- 1 sc in each sc around.
Rnd 7- 1 sc in each of first 6 sc, 2 sc in next sc, 1 sc in each of next 13 sc, 2 sc in next sc, 1 sc in each of last 5 sc. (28 sc)
Fasten off Petal Pink, leaving long tail to sew with. Measure Front of Body and center muzzle, pinning it in place all around except point
where you will be inserting the stuffing. Stuff with Fiberfill. Thread blunt needle and sew in place. Fasten off and weave in tail.
Thread blunt needle with Black and embroider nostrils and mouth as you see in photos. Fasten off and weave in tails.

Spots for Front of Body-
Spot #1-
With Black, ch 11.
Row 1- 1 sc in 2nd ch from hk and in each ch across. (10 sc)
Row 2- Sc2 tog over first 2 sc, 1 sc in each sc till last 2 sc, sc2tog over last 2 sc. (8 sc)
Row 3- Sc2tog over first 2 sc, 1 sc in each sc till last 2 sc, sc2tog over last 2 sc. (6 sc) Ch 1, turn.
Row 4- 1 sc in each sc across. (6 sc)
Row 5- Sc2tog over first 2 sc, 1 sc in each of next sc till end of row. (5 sc)
Row 6- Sc2tog over first 2 sc, 1 sc in each sc till end of row. (4 sc)
Row 7- Sc2tog over first 2 sc, 1 sc in each sc till end of row. (3 sc)
Row 8- Sc 2 tog over first 2 sc, 1 sc in last sc. (2 sc) Fasten off leaving long tail to sew with.
Thread blunt needle. Pin spot to Body and sew with spot between Burgundy and Buff squares as seen in photos. Fasten off, weave in tail.

Spot #2-
With Black, ch 16.
Row 1- 1 sc in 2nd ch from hk and in each ch across.(15 sc)
Row 2- Sc2 tog over first 2 sc, 1 sc in each of next 11 sc, leave last 3 sc unworked. (12 sc)
Row 3- Sc2tog over first 2 sc, 1 sc in each of next 8 sc, sc2tog over last 2 sc. (10 sc)
Row 4- Sc2tog over first 2 sc, 1 sc in each of next 3 sc, 2 sc in next sc, leave last 2 sc unworked. (8 sc)
Row 5- Sc2tog over first 2 sc, 1 sc in each sc till last sc. (7 sc)
Row 6- Sc2tog over first 2 sc, 1 sc in next sc, 2 sc in next sc, sc 2 tog over next 2sc. (5 sc)
Row 7- Sc2tog over first 2 sc, 1 sc in each of next 3 sc, 3 sc in last sc. (6 sc)
Row 8- Sc2tog over first 2 sc, 1 sc in each of next 2 sc, sc2tog over last 2 sc. (4 sc)
Row 9- Sc2tog over first 2 sc, 1 sc in each of last 2 sc. (3 sc)
Row 10- 1 sc in each sc across. (3 sc) Fasten off, leaving long tail to sew with.
Thread blunt needle. Pin spot to bottom of Body and sew with spot between Burgundy and Buff squares as seen in photos. Fasten off, weave in tail.

Spot #3-
With Black, ch 2.
Half Rnd 1- 6 sc in 2nd ch from hook, but do not join into a rnd. (6 sc)
Half Rnd 2- 2 sc in each sc across.(12 sc)
Half Rnd 3- 1 sc in each of first 4 sc, 2 sc in next sc, 1 sc in each of next 3 sc, 2 sc in next sc, 1 sc in each of last 3 sc. (14 sc)
Thread blunt needle. Pin spot to top of Front and sew in place. Fasten off, weave in thread.

Spots for Back of Body-
Spot #1-
With Black, ch 2.
Half Rnd 1- 6 sc in 2nd ch from hook, but do not join into a rnd. (6 sc)
Half Rnd 2- 2 sc in each sc across.(12 sc)
Half Rnd 3- 1 sc in each of first 4 sc, 2 sc in next sc, 1 sc in each of next 3 sc, 2 sc in next sc, 1 sc in each of last 3 sc. (14 sc)
Half Rnd 4- 1 sc in each of first 6 sc, 2 sc in next sc, 1 sc in each of next 4 sc, turn.
Half Rnd 5- Sc2tog over first 2 sc, 1 sc in each of next 5 sc, turn.
Half Rnd 6- Sc2tog over first 2 sc, 1 sc in next sc, 2 sc in next sc, 1 sc in next sc, sl st in next sc. Fasten off, leaving long tail to sew with.
Thread blunt needle. Pin spot to Back of Body in between the Burgundy and Buff squares, sew in place. Fasten off, weave in tail.

Spot #2-
With Black, ch 9.
Row 1- 1 sc in 2nd ch from hook and in each ch across. (8 sc)
Row 2- Sl st in first sc, 1 sc in each of next 6 sc, ch 1, turn, leave last sc unworked. (6 sc)
Row 3- Sl st in first sc, 1 sc in each of next 4 sc, leave last sc unworked. (4 sc) Ch 1, turn.
Row 4- 1 sc in each sc across. (4 sc)
Row 5- Sc2tog over first 2 sc, 1 sc in each of next 2 sc. (3 sc) Fasten off,
leaving long tail to sew with.

Spot #3-
With Black, ch 2.
Rnd 1- Work 8 sc in 2nd ch from hook, sl st to join rnd. (8 sc)
Rnd 2- 2 sc in each sc around. (16 sc)
Rnd 3- 2 sc in first sc, 1 sc in next sc, rep around, sl st to join rnd. (24 sc) Fasten off,
leaving long tail to sew with.

Tail-
Cut 2 yarn strands 58 inches long on the following colors:
Buff
Claret
Carrot

Fold in half, and make wrapping the yarn around your thumb, make a knot, leaving a small loop on top to sew tail with.
Now, divide the strands in 3 sections of 4 strands each and braid.
Wrap again around your thumb and make a knot. Cut the ends evenly to make a tassel of the end of the tail.
Measure center of Back, and pin the tail. Thread a blunt needle with yarn and sew tail in place through the loop you left
on top. Fasten off, weave in tail.
Note- Sew firmly because you know that children like to pull tails!

Ears-
Ear #1-

With Buff, ch 2.
Rnd 1- Work 5 sc in 2nd ch from hook. Sl st to join rnd. (5 sc)
Rnd 2- 1 sc in each sc around. (5 sc)
Rnd 3- 2 sc in each sc around. (10 sc)
Rnd 4- 1 sc in first sc, 2 sc in next sc, rep around. (15 sc)
Rnd 5- 1 sc in each of first 2 sc, 2 sc in next sc, rep around. (20 sc)
Rnd 6- 1 sc in first sc, 2 sc in next sc, [1 sc in each of next 2 sc], rep from 3 more times, 1 sc in each of rest sc around. (24 sc)
Rnd 7- 1 sc in each sc around. (24 sc)
Set aside for a moment and make Ear Spot as follows:

Ear Spot-


With Black, ch 2.
Rnd 1- Make 8 sc in 2nd ch from hook. Sl st to join rnd. Fasten off, leaving long tail to sew with.
Pin to ear and sew in place, making sure you do not catch any of the loops you will need to continue crocheting.
Fasten off, weave in tail. Continue ear as follows:
Ear Rnd-
Rnd 8- 1 sc in each sc around. (24 sc)
Rnd 9- 1 sc in first sc, sc2tog over next 2 sc, *1 sc in each of next 3 sc, sc2tog over next 2 sc, rep from * around. (16 sc)
Set aside for a moment and make "Pink" of Ear as follows:

"Pink" of Ear-

With Petal Pink, ch 2.
Row 1- 1 sc in 2nd ch from hook. Ch 2 turn. (2 sc)
Row 2- 1 sc in 2nd ch from hook and next sc, and in top of turning ch. Ch 2, turn. (3 sc)
Row 3- 1 sc in 2nd ch from hook and next sc, and in top of turning ch. Ch 1, turn. (4 sc)
Row 4- 1 sc in each sc across.(4 sc)
Rnds 5 to 6- 1 sc in each sc across. (4 sc)
Row 7- 1 sc in each sc across. Fasten off, leaving long tail to sew with.
Pin to back of ear (side opposite to where you sewed the "Spot") and sew in place. Fasten off, weave in tail.
Continue making Ear as follows:
Ear Rnd-
Rnd 8- 1 sc in each sc around. (24 sc)
Rnd 9- 1 sc in each of first 3 sc, sc2tog over next 2 sc, rep around. (19 sc)
Rnd 10- Sc2tog over first 2 sc, *1 sc in each of next 2 sc, sc2tog over next 2 sc, rep from * around. (14 sc)
Rnd 11- Sc2tog over first 2 sc, 1 sc in each of rest sc around.(13 sc) Fasten off, leaving long tail to sew with.

Ear #2-

With Carrot, ch 2.
Rnd 1- Work 5 sc in 2nch ch from hook. (5 sc)
Rnd 2- 1 sc in each sc around. (5 sc)
Rnd 3- 2 sc in each sc around. (10 sc)
Rnd 4- 1 sc in first sc, 2 sc in next sc, rep around. (15 sc)
Rnd 5- 1 sc in each sc around. (15 sc)
Rnd 6- 1 sc in first sc, 2 sc in next sc, *1 sc in each of next 2 sc, 2 sc in nect sc, rep from * around. (20 sc)
Rnd 7- 1 sc in each sc around. (20 sc)
Set aside for a moment and make "Pink" of Ear as follows:

"Pink" of Ear-

With Petal Pink, ch 2.
Row 1- 1 sc in 2nd ch from hook. Ch 2 turn. (2 sc)
Row 2- 1 sc in 2nd ch from hook and next sc, and in top of turning ch. Ch 2, turn. (3 sc)
Row 3- 1 sc in 2nd ch from hook and next sc, and in top of turning ch. Ch 1, turn. (4 sc)
Row 4- 1 sc in each sc across. (4 sc)
Rnds 5 to 6- 1 sc in each sc across. (4 sc)
Row 7- 1 sc in each sc across. Fasten off, leaving long tail to sew with.
Pin to back of ear (side opposite to where you sewed the "Spot") and sew in place. Fasten off, weave in tail.
Continue making Ear as follows:
Ear Rnd-
Rnd 8- 1 sc in each sc around. (20 sc)
Rnd 9- 1 sc in first sc, sc2tog over next 2 sc, *1 sc in each of next 3 sc, sc2tog over next 2 sc, rep from * around. (16 sc)
Rnd 10- 1 sc in each of first 3 sc, sc2tog over next 2 sc, *1 sc in each of next 3 sc, sc2tog over next 2 sc, rep from * around. (13 sc)
Rnd 11- 1 sc in each sc around.(13 sc) Fasten off, leaving long tail to sew with.

Stuff Body and sew top. Fasten off and weave in tail. Place ears on sides of head. Pin down and sew in place. Fasten off and weave in tail.
Done!


....................................................................

Read FREE online, the beautiful book on the life of Christ, The Desire of Ages see the comforting love of God like never before in these tough times!

Funmigurumi Monkeyroo 4: Bananas

Best Blog Tips


Bananas is my fourth monkeyroo (counting two baby rattles and LeeLoo) and I must admit, she's been the most fun to make! I wanted to give her the playful, colorful, fun look that characterizes the Funmigurumi which are my trademark. Also, she had to have her own "personality." Here she is! What do you think?
If you love Bananas and would like to make her, here's the pattern:
Materials:Red Heart worsted weight yarn Carrot
Red Heart worsted weight yarn Pumpkin
Red Heart worsted weight yarn Pale Yellow (could be Bright Yellow) (scraps)
Red heart worsted weight yarn Black (scraps)
Blunt needle
Fiberfill
Scissors
Measuring tape
Crochet hook size H

Body- Back: With Carrot, ch 31.
Row 1- 1 sc in 3rd ch from hook and in each ch across, ch 1, turn. (30 sc)
Row 2- 1 sc in each sc across. Ch 1, turn. Rows 3 to 30- Rep row 2. Fasten off Carrot, leaving long tail to sew with.
Front- With Carrot, ch 31.
Row 1- 1 sc 3rd ch from hook and in in each ch across, ch 1, turn (30 sc).
Row 2- 1 sc in each sc across, ch 1, turn. Rows 2 to 5- Rep row 2.
Side 1- Row 6- 1 sc in each of first 5 sc, ch 1, turn. Rows 7 to 30- Rep row 6. Fasten off, leaving long tail to sew with.
Side 2- Row 6- 1 sc in each of last 5 sc, ch 1, turn. Rows 7 to 30- Rep row 6. Fasten off, leaving long tail to sew with.
Join Pumpkin, leaving a long starting tail (later, your will be using it for sewing.)
Front Middle Section of Body:Row 1- Insert hook in sc right after first side strip made with Carrot yarn and work 1 sc, make 1 sc in each of next 19 sc. Ch 1, turn.
Rows 2 to 20- 1 sc in each sc across this section. Ch 1, turn.
"Face Shape" Left Side- Row 1- 1 sc in each of first 7 sc. Ch 1, turn. Row 2- 1 sc in each sc across this section, ch 1, turn. (7 sc made.)
Rows 3 to 5- Rep row 2. Fasten off, leaving long tail to sew iwth.
"Face Shape" Right Side- Skip 6 middle sc. Row 1- Join Pumpkin again. 1 sc in each of last 7 sc. Ch 1, turn.
Row 2- 1 sc in each of 7 sc. Ch 1, turn. Rows 3 to 5- Rep row 2. Fastenoff, leaving long tail to sew with.
"Face Shape" Middle Section- Join Carrot. Rows 1 to 5- Work 1 sc in each of center sc for 5 rows. Fasten off, leaving long tail to sew with.
Thread a blunt needle and sew sections to each other, assembling the Front of the Body. Fasten off.
Place both front and back of Body right sides facing, and Carrot square made facing upwards,and sew both sides together. Fasten off. Sew Bottom closed. Fasten off.
Turn toy's Body from wrong side out and set aside.
Bangs- With Carrot, ch 9. 1 sc in 2nd ch from hook and in each ch across. Fasten off,leaving long tail to sew with. Measure and cut 16 pieces of 7 1/4inches of Carrot yarn. Attach 1 to each Front loop of the row of sc made for the Bangs, and attach 1 to each foundation loop at the bottom of the row as follows:
Bend yarn in half, pairing ends to same length, insert hook in desired spot and using the middle of the yarn as a loop, pull that loop through the desired stitch, then place the ends over your index finger and using the hook, pull them both through the loop you just formed. Pull to tighten ("hair" attached.)Continue this way until you have attached all the pieces suggested. Using tail left over, sew this "hair" piece to the front of Bananas face over the Carrot-colored square at edge of top, but leave top open for stuffing. Fastgen off.
Legs (Make 2)- With Pumpkin, ch 2.
Rnd 1- 6 sc in 2nd ch from hook, sl st to join rnd. Rnd 2- 2 sc in each sc around (12sc). Rnd 3- 1 sc in each of first 2 sc, 2 sc in next sc, rep around. (16 sc)
Rnd 4- 1 sc in each of first 2 sc, 2 sc in next sc, rep around. (24 sc)
Rnd 5- 1 sc in each sc around. Fasten off Pumpkin.(24 sc) Rnd 6- Join Carrot. Make 1 sc in each sc around. (24 sc)
Rnds 7 to 25- 1 sc in each sc around. (24 sc)Fasten off, leaving long tail to sew with.
Arms (Make 2)- With Pumpkin, work first 3 rounds as for Legs.
Rnds 4 to 25- 1 sc in each sc around. (16 sc)Fasten off Pumpkin.
Rnd 26- Join Carrot. Work 1 sc in each sc around.
Rnd 27- 1 sc in each sc around. Rnd 28- 1 sc in each of first 8 sc, sc2tog over next 2 sc, 1 sc in each sc till end of rnd. (15 sc)
Rnd 29- 1 sc in each sc around. (15 sc)
Rnd 30- 1 sc in each of first 4 sc, sc2tog over next 2 sc, 1 sc in each sc till end of rnd. (14 sc)
Rnds 31 to 32- 1 sc in each sc around. (14 sc)Fasten off, leaving long tail to sew with.
Gently stuff legs with Fiberfill, sew to bottom of Body using tail you left over. Fasten off.
Tail- With Carrot, ch 58. 3 dc in 4th ch from hook. 4 dc in next ch. *4 dc in next ch. Rep from * across. Fasten off, leaving long tail to sew with. Measure back, center tial and pin in place. Sew. Fasten off.
Flower for "Bangs"- With Pale Yellow and allowing a long tail at start, ch 5. Sl st to join rnd.
Ch 3, 2 dc in ring, ch 3, 1 sc in ring, *ch 3, 2 dc in ring, ch 3, 1 sc in ring, rep from * around. Sl st to beginning ch 3 to join round. Fasten off, leaving long tail.
Ears (Make 2) Back- With Carrot, ch2.
Rnd 1- Make 6 sc in 2nd ch from hook, sl st to join rnd.
Rnd 2- 2 sc in each sc around.
Rnd 3- 1 sc in first sc, 2 sc in next sc, rep around.
Rnd 4- 1 sc in each of first 3 sc, 2 sc in next sc, rep around.
Rnd 5- 1 sc in each of first 4 sc, 2 sc in next sc, 1 sc in each of next 2 sc, 2 sc in next sc, *1 sc in each of next 4 sc, 2 sc in next sc, rep from * around. Fasten off, leaving long tail to sew with.
Front of Ears (Make 2)- With Pumpkin, repeat first 4 rows as for Back of Eears. Using leftover tail and with Right Sides facing, sew 1 Back and 1 Front of ear together (yes, the Back is larger than the Front so that it will "fold" creating a "rim" for the ear), leave opening at the bottom of ear to join to body. Fasten off.
Muzzle- This is a needle sculpted muzzle to give Bananas a more "monkeyish" look. It is fun to make and very effective (don't be intimidated by the term "needle sculpted" it is quite easy to make! This is Craftybegonia!)
With pumpkin, ch 2. Rnd 1- Work 6 sc in 2nd ch from hook. Sl st to join rnd. Rnd 2- 2 sc in each sc around. Rnd 3- 1 sc in first sc, 2 sc in next sc, rep around. Rnd 4- 1 sc in each of first 2 sc, 2 sc in next sc, rep around. Rnd 5- 1 sc in each of first 4 sc, 2 sc in next sc, *1 sc in each of nest 3 sc, 2 sc in next sc, rep from * around. Rnd 6- 1 sc in each of first 6 sc, 2 sc in next sc, *1 sc in each of next 5 sc, 2 sc in next sc, rep from * around. Rnd 7- [1 sc in each of first 4 sc, 2 sc in next sc] rep twice, 1 sc in each of next 6 sc, 2 sc in next sc, [1 sc in each of next 6 sc, 2 sc in next sc] repeat twice, 1 sc in each sc to end of rnd. Rnd 8- 1 sc in each sc around.
Rnd 9- 1 sc in each of first 5 sc, 2 sc in next sc, rep around. Rnd 10- 1 sc in each sc around. Fasten off, leavbing long tail to sew with.
Mouth ("Lips")- With Pumpkin, thead a blunt needle. With your fingers, "pinch" a wrinkle across the lower middle of muzzle, forming a "lip." Still holding the "pinched" wrinkle, taking the needle, secure it by sewing the stitches firmly in place on the inside of Banana's Face. Repeat with the upper "lip." Use photos to guide yourself. To make sure the "lips" will stay in place, make a couple of stitches on each edge of the Mouth. Fasten off.
Measure Face and center Muzzle in place,pin down, leaving an opening through which you will stuff it lightly. Sew in place. Fasten off.
Measure Front of Body, sew Ears in place. Fasten off. Stuff Arms and measuring for same height, pin and sew in place at both sides of Body. Fasten off.
"Tie" Bangs witht he tails left on the ends of the Flower, and secure to Face so that little hairdo will not come undone.
Eyes (Make 2)- With Black, ch 2. Make 6 sc in second ch from hook, sl st to join rnd. Fasten off, leaving long tail to sew with. Place eyes above Muzzle as seen in pictures, pin down. Thread a blunt needle with tail and sew in place. Embroider eyelashes. Fasten off.
Stuff Body and sew top. Fasten off.

Done!


Bible Questions People Ask

.....................................................................................

Funmigurumi Poochie Dog No. 7: Muffin

Best Blog Tips


Hope you guys don't mind if I share with you some challenging projects to "expand" your toy-making skills! Muffin, like Baxter, is suggested for Intermediate crocheters, although a beginner who carefuly follows instructions can tackle him any day and come up with a satisfactory result. As all my patterns, he is pretty simple overall, it is when it comes to his "face" that the challenging part begins, but it can be fun and you can wind up with the cutest dog you've ever tried, so don't pass by on the chance to make him!
Muffin is just a lovable doggie. His color mix shouts friendly, playful and happy, without being too high-energy. The expression of his face is that of a fun-loving and gentle dog.

Red Heart worsted weight yarn Claret
Red Heart worsted weight yarn Buff
Red Heart worsted weight yarn Aran
Red Heart worsted weight yarn Coffee (scraps)
Red Heart worsted weight yarn Black (scraps)
Crochet size H hook
Fiberfill
Scissors
Blunt needle
cardboard or ruler
Pins
measuring tape

As I said before, the only challenging portion of this pattern is reproducing the skin at both sides of the muzzle which forms folds that contribute to the expression of the face, but if you follow the instructions carefully, I have no doubts that you can master these "wrinkles".
Body- (Make 2): With Claret, ch 31. Row 1- 1 sc in third ch from hook and in each ch across (31 sc). Ch 1, turn. Row 2- 1 sc in each sc across.
Ch 1, turn. Rows 3 to 15- Rep row 2. Fasten off, leaving long tail to sew with.
Row 16- Join Buff. Make 1 sc in each sc across. Ch 1, turn. Rows 17 to 30- Rep row 16. Fasten off, leaving long tail to sew with.
Place both right sides of body facing, sew sides and bottom, leaving top open. Fasten off.
Body Spot 1- With Coffee, ch 2.
Rnd 1- Make 6 sc in 2nd ch from hook, sl st to join rnd. Rnd 2- Make 2 sc in each sc around. Rnd 3- 1 sc in first sc, 2 sc in next sc, rep around.
Rnd 4- 1 sc inb each of first 2 sc, 2 sc in next sc, rep around. Rnd 5- 1 sc in each of first 3 sc, 2 sc in next sc, rep around. Rnd 6- 1 sc in each of first 4 sc, 2 sc in next sc, rep around.
Rnd 7- 1 sc in each of first 5 sc, 2 sc in next sc, rep around. Fasten off, leaving long tail to sew with. Measure back, pin in place, thread blunt needle with tail left over and sew in place. Fasten off.
Body Spot 2- With Coffee, repeat rounds 1 to 5 of Spot 1. Fasten off, leaving long tail to sew with. Pin in place, just above Body Spot 1, sew, fasten off.
Tail- With Aran, ch 2. Rnd 1- Make 6 sc in 2nd ch from hook, sl st to join rnd. Rnds 2 and 3- 1 sc in each sc around. Rnd 4- 1 sc in first sc, 2 sc in next sc, rep around. Rnd 5- 1 sc in each sc around. Fasten off.
Rnd 6- Join Coffee. Make 2 sc in first 3 sc, 1 sc in each of next 5 sc. Rnd 7- 1 sc in each sc around. Rnds 8 to 16- Make 1 sc in each sc around. Fasten off, leaging long tasil to sew with. Stuff lightly with fiberfill, pin in place in the center of Body Spot 1, sew in place. Fasten off.
Face Marking- With Aran, ch 13.
Row 1- 1 sc in 3rd ch from hook and in each ch across. Ch 1, turn. Row 2- 1 sc in each sc across. Row 3- Sc2 tog over first 2 sc, 1 sc in each sc till last 2 sc, sc2tog over last 2 sc.
Row 4- 1 sc in each sc across. Row 5- Rep row 3. Row 6- Rep row 4. Row 7- Rep row 3. Row 8- Rep row 4. Row 9 to 11- Rep row 4. Fasten off, leaving long tail to sew with. Measure front of toy, center in "face" area of body, pin down and sew in place. Fasten off.
Muzzle- First Part- With Aran, ch 11.
Round 1- Make 1 sc in 3rd ch from hook and in each ch across till you reach last ch, work 2 sc in that ch, turn piece around and working at the bottom of the stitches, make 2 sc in first foundation chain loop, 1 sc in each loop till you reach the last one, 2 sc in that final loop, slip st to join round.
Rnd 2- 2 sc in first sc, 1 sc in each of next 8 sc, 2 sc in next sc, 1 sc in each of next 10 sc, 2 sc in last sc. Rnd 3- 2 sc in 1st sc, 1 sc in each of next 10 sc, 2 sc in next sc, 1 sc in each of next 2 sc, 2 sc in next sc, 1 sc in each of next 7 sc, 2 sc in last sc.
Rnd 4- 2 sc in first sc, 1 sc in each of next 11 sc, 2 sc in next sc, 1 sc in each of next 3 sc, 2 sc in next sc, 1 sc in each of next 9 sc, 2 sc in last sc. Rnd 5- 1 sc, 2 sc in next sc, 1 sc in each of next 11 sc, 2 sc in next sc, 1 sc in each of next 3 sc, 2 sc in next sc, 1 sc in each of next 12 sc, 2 sc in next sc, 1 sc in last sc. Fasten off Aran, weave in tail.
Sides of Muzzle (Jowls)- Fold the muzzle in half (you will be working only from the middle of the bottom up to one side, and then back to bottom until you finish one jowl, you will fasten off, and then do the same on the opposite side)so that you will find the very middle of the bottom, and, inserting the hook in the middle of the lower part of it, join Aran again. Row 1- Ch 1, 1 sc in each of next 8 sc, 2 sc in next sc, 1 sc in each of next 3 sc, 2 sc in next sc, sl st in next sc. Turn.
Row 2- Sl st, make 1 sc in each of next 5 sc, 2 sc in next sc, 1 sc in each of next 8 sc, sl st in last st, turn.
Row 3- Sl st in first st, 1 sc in next sc, 2 sc in next sc, 1 sc in each of next 6 sc, 2 sc in next sc, 1 sc in each of next 5 sc, sl st in last st. Turn.
Row 4- 1 sc in each sc across. Row 5- Ch 1, [1 sc in each of next 3 sc, 2 sc in next sc] repeat 3 times, 1 sc in each of next 2 sc. Sl st in last sc. Turn. Row 6- Ch 1, 1 sc in each of next 5 sc, 2 sc in next sc, 1 sc in each of next 4 sc, 2 sc in next sc, 1 sc in each of next 4 sc, 2 sc in next sc, 1 sc in each of last 2 sc, turn. Row 7- Ch 1, 1 sc in each of next 4 sc, 2 sc in next sc, [1 sc in each of next 5 sc, 2 sc in next sc] repeat twice, 1 sc in each sc to end of row.
Rows 8 to 10- 1 sc in each sc across. Fasten off, repeat on the other side.
Wrinkles- This is a bit of needle sculpting but don't be afraid of it. Thread a blunt needle with Aran. "Pinch" the upper part of the jowl on one side with your fingers, just as it leaves muzzle. Secure the "wrinkle" in place by sewing at the back. Fasten off. "Pinch" the outer edge of the same jowl and repeat the procedure with a longer wrinkle. With your fingers again, "pinch" in the middle lower part, between the two previous wrinkles, make a small wrinkle there, sew in place. Fasten off and repeat on the other side. When you have completed the "wrinkles on both sides, thread a needle with Aran and pass it in and out of the stitches along the lower edge of the jowl and pull gently to gather it, secure and fasten off. Repeat on the opposite side. Set aside until you make nose.
Nose- With Black, ch 7.
Row 1- 1 sc in 3rd ch from hook and in each ch across. Ch 1, turn. Rows 2 to 3- 1 sc in each ch across. Fasten off, leaving long tail to sew with. Measure and center nose on muzzle, pin in place and sew. Embroider mough. Fasten off.
Lightly fill muzzle (NOT JOWLS) with fiberfill, pin in place, uppoer top meeting just the very edge of the face marking, thread blunt needle with Aran and sew in place, gathering and scrunching the wrinkles as you go so that they will look like loose, hanging cheeks.
Eyes- (Make 2:) This dog has sweet yet somewhat sad eyes. To make them proceed as follows: With Coffee, ch 2. Rnd 1- Make 6 sc in second ch from hook. Sl st to join round. Fasten off. Join Cafe. Ch 1, 1 sc in each of next 3 sc. Fasten off. Pin eyes in place as you see in photos. Thread blunt needle with Black and sew in place, emphasizing the black "rim" of the eye all around. Fasten off.
Eyelids- With Cafe, ch 9.
Row 1- 1 sc in 3rd ch from hook and in each ch across. Fastenoff, leaving long tail to sew with. Pin in place above eyes, making sure that the upper Black rim of the eyes is not covered by the lid, curving it around the eye. Sew in place as seen in photos. Fasten off.
Legs- With Aran and H hook, ch 2. Rnd 1- Make 6 sc in 2nd ch from hook, slip st to close rnd. Rnd 2- Make 2 sc in each sc around.
Rnd 3- 1 sc in each of first 2 sc, 2 sc in next sc, rep around. Rnd 4- 1 sc in each of first 3 sc, 2 sc in next sc, rep around.
5 to 10- Make 1 sc in each sc around. Rnds 11 to 13- Make 1 sc in each sc around. Fasten off, leaving long tail to sew with. Stuff legs with Fiberfill and sew to bottom of body as seen in photos.
Arms- With Aran, and H hook, Ch 2. Rnd 1- Make 6 sc in 2nd ch from hook, slip st to close round. Rnd 2- Make 2 sc in each sc around.
Rnd 3- Make 1 sc in each of first 2 sc, 2 sc in next sc, rep around. Rnd 4- Make 1 sc in each of first 3 sc, 2 sc in next sc, rep around. Fasten off.
Rnd 5- Make 1 sc in each sc around. Rnds 6 to 11- Join Gold. Make 1 sc in each sc around. Fasten off, leaving long tail to sew with. Stuff arms and attach to body as seen in photos (about half way down to give some room to fluffy ears).
Stuff legs and sew in place. Fasten off. Stuff arms and sew in place. Fasten off.
Ears- (Make 4)- With Cafe, ch 12.
Row 1- 1 sc in 3rd ch from hook and in each ch across. Ch 1, turn. Row 2- 1 sc in each sc across. Ch 1, turn. Rows 3 to 7- Rep row 2. Row 8- Sc 2 tog over first 2 sc, 1 sc in each sc till last 2, sc2tog over last 2 sc. Fasten off, leave long tail to sew with.
Row 9- Join Coffee, make 1 sc in each sc across. Row 10- Sc2tog over first 2 sc, 1 sc in each sc till last 2, sc2tog over last 2 sc. Row 11- 1 sc in each sc across. Row 12- Sc 2 tog over first 2 sc, 1 sc in each sc till last 2, sc2tog over last 2 sc.
Rows 13 to 14- 1 sc in each sc across. Fasten off, leave long tail to sew with.
Place 2 pieces together, and sew all around using tails left over. Fasten off. Do not stuff ears. Put aside till time to sew them on.
Stuff the body and close the top. Fasten off. Attack the ears at the sides and sew them in place. Fasten off.
You're done!
Please remember that I share my patterns with you in good faith. They belong to Craftybegonia, please use them only for personal or charity purposes. Thank you!

Pattern has been checked and corrected March 2011.


Read FREE Online! Deathwatch in Siberia

Funmigurumi Poochie Dog No. 6: Baxter

Best Blog Tips


Baxter is a different dog. True, he is a lovable mutt, with all the charm and ingenious appearance that only a mixed-breed can have, but there is more to Baxter.
Baxter will teach you how to make a needle sculptured expression! So this is a little more than just a pattern, this is a tutorial that I hope you will enjoy and at the same time teach you something you can use in other toys.


I suggest this pattern for intermediate crocheters. Although the basic pattern is very easy, there is a tiny bit of needle sculpting and a composite muzzle to make and that might be a little complicated for a beginner, otherwise, go for it,
it is a fun project and the result is a very nice Funmigurumi!
Materials:
Red Heart worsted weight yarn Gold
Red Heart worsted weight yarn Cafe (scraps)
Red Heart worsted weight Coffee (scraps)
Red Heart worsted weight Black (scraps)
Red Heart worsted weight yarn Soft Brown
Red Heart worsted weight yarn White (scraps)
Red Heart worsted weight yarn Linen

Crochet size H hook
Fiberfill
Scissors
Blunt needle
cardboard or ruler
Pins
measuring tape
Note: Baxter's muzzle is somewhat complex because it is is a composite, so please, read the instructions carefully so that you can follow them well and come up with a successful and satisfactory result!

Body- (Make 2): With Gold, ch 31. Row 1- 1 sc in third ch from hook and in each ch across (31 sc). Ch 1, turn. Row 2- 1 sc in each sc across.
Ch 1, turn. Row 3 to 15- Rep row 2. Fasten off, leaving long tail to sew with.
Row 16- Join Cafe. Make 1 sc in each sc across. Ch 1, turn. Rows 17 to 30- Rep row 16. Fasten off, leaving long tail to sew with.
Place both right sides of body facing, sew sides and bottom, leaving top open. Fasten off.
Eye Patch- With White, ch 11. Row 1- 1 sc in 3rd ch from hook and in each ch across. Ch 1, turn (10 sc made). Row 2- 1 sc in each sc across.
Ch 1, turn. Row 3 to 7 Rep row 2. Fasten off. Join Black. Round 8- 1 sc in each sc across till you reach last sc, make 2 sc in last sc, turn the corner and work across the narrow end of patch, making 1 sc per row, make two sc in last row as you turn the corner, then make 1 sc in
each loop of foundation chain until you reach the end, make 2 sc in that last loop, turn the corner again and working on narrow end of patch, make 1 sc per row until you reach beginning sc, add 1 sc in that spot. Fasten off, leaving long tail to sew with.

Brown Circle Spot- With Coffee, ch 24, sl st to join round. Rnd 1- Ch 1, 1 sc in first ch, 2 sc in next sc, 1 sc in each of next 6 ch, 2 sc in next ch, *1 sc in each of next 5 ch, 2 sc in next ch, rep from * around. Fasten off, leaving long tail to sew with. Sew this circle onto eye patch as seen in photos.
Muzzle- (Central piece) With Linen, ch 7. Row 1- 1 sc 3rd ch from hook and in each ch across (5 sc). Ch 1, turn. Row 2- 2 sc in first sc, 1 sc in each of next 4 sc, 1 sc in each of last 2 sc, turn around and make 2 sc in first
loop of foundation chain, 1 sc in each of next 3 sc, 2 sc in last loop of foundation ch, sl st to join rnd. (14 sc)
Rnd 3- 2 sc in first sc, 1 sc in each of next 6 sc, 2 sc in next sc, 1 sc in each of next 5 sc, 2 sc in first ch 1 sp, sl st to join rnd. (18 sc)
Row 4- 1 sc in each of first 5 sc, 2 sc in next sc, 1 sc in each of next 9 sc, 2 sc in next sc, 1 sc in next sc, 1 sc in front of brginning ch 1, sl st to join rnd. (20 sc)
Rnd 5- 1 sc in each of first 7 sc, 2 sc in next sc, 1 sc in each of 10 sc, 2 sc in next sc, 1 sc in next sc 1 sc jn front of beginning ch 1, sk st to join rnd. (23 sc)
Rnds 6 to 8- 1 sc in each sc around. Sl st to join rnd. (23 sc)
Semi Rnd 9- Ch 12 sc in first sc, 1 sc in each of next 7 sc, 2 sc im next sc, sl st in next sc. Fasten off, leaving long tail to sew with. (The extra half rnd is to add height to the upper portion of the muzzle for additional cuteness.) Set aside center of muzzle.

Sides of Muzzle- (Make 2)- With Linen, ch 7.
Rnd 1- 1 sc in 3rd ch from hook and in each ch across. (5 sc) Turn around, 2 sc in first loop of foundation chain, 1 sc in each loop of foundation chain to end of round, sl st to join rnd. (11 sc)
Rnd 2- 2 sc in first sc, 1 sc in each of next 2 sc, 2 sc in next sc, 1 sc in each of next 2 sc, 2 sc in next sc, 1 sc in next of 3 sc, 2 sc in next sc, 1 sc in front of first ch 1, sl st to join rnd.(15 sc)
Rnd 3- 1 sc in each of first 5 sc, 2 sc in next sc, 1 sc in each of next 6 sc, 2 sc in next sc, 1 sc in each of next 2 sc 1 sc in front of beginning ch 1, sl st to join rnd.(18 sc)
Rnd 4- 2 sc in first sc, 1 sc in each of next 8 sc, 2 sc in next sc, 1 sc in each 4 sc, 2 sc in next sc, 1 sc in each of next 3 sc, 1 sc in front of beginning ch 1, sl st to join rnd.(21 sc)
Rnd 5- 2 sc in first sc, 1 sc in each of next 4 sc, 2 sc in next sc, 1 sc in each of next 5 sc, 2 sc in next sc, 1 sc in each of next 4 sc, 2 sc in next sc, 1 sc in front of beginning ch 1, sl st to join rnd. (25 sc)
Rnd 6- 1 sc in each of 1st 3 sc, 2 sc in next sc, 1 sc in each of next 5 sc, 2 sc in next sc, 1 sc in each of next 4 sc, 2 sc in next sc, 1 sc in each of next 5 sc, 2 sc in next sc, 1 sc in each of next 3 sc, 1 sc in front of beginning ch 1, sl st to join rnd.(29 sc)
Rnd 7- Ch 1, 1 sc in each of next 7 sc, 2 sc in next sc, 1 sc in each of next 4 sc, 2 sc in next sc, 1 sc in each of next 5 sc, 2 sc in next sc, 1 sc in each of next 8 sc, 1 sc in front of brg ch 1, sl st to end of round. (33 sc) Fasten off leaving long tail to sew with.
Repeat on second one. Pin these two pieces to the sides of the main muzzle and sew. Stuff them firmly. follow photos to put muzzle together.

Nose- With Black, ch 6. Row 1- 1 sc in 3rd ch from hook, 1 sc in each ch to end of row. Ch 1, turn. Row 2- 1 sc in each sc across. Ch 1, turn. Row 3- 1 sc in each sc across. Fasten off, leaving long tail to sew with.
Pin to muzzle and sew all around. Embroider mouth. Stuff lightly. Measure Baxter's face and center this composite muzzle to the dog's "face" as seen in photos, pin down and thread a blunt needle with the long tail left and begin to sew. As you sew, try to shape the "wrinkles" on both sides of the nose as the cute "drooping cheeks" form on both sides of the nose, stuff a little more if you have to and as you continue to sew, use your fingers to continue to shape the hanging "cheeks" and gently stitch the "wrinkles" in place with tiny stitches that will not pull on the sc stitches that form the fabric but will disappear into them.
Additional explanatory note- Please, look carefully at the pictures. They show that the hanging pouches are sewn in a vertical direction. You crochet the whole muzzle in sections, stuff it, and sew the individual pieces to each other before you pin it to the face and sew all around.
In comparison to the center of the muzzle, the side pouches hang vertically.
Eyes- (Make 2)- With Black, ch 2. Make 6 sc into 2nd ch from hook, sl st to join. Fasten off, leaving long tail to sew with.
Measure where the eye should go within the eyepatch, pin in place and sew using the tail you left. Fasten off. Sew the other eye at same level on the other side of the one in the eyepatch.
Sculptured Eyebrow- With Gold, thread a blunt needle. With your fingers, create the "arched ridge" of the brow as seen in photos, then, inserting the needle from the top to the bottom, in a downward, vertical motion,
start stitching, go upwards and then again downwards, pulling ever so gently as you come in and out with your needle, until you finish going across and a protruding, somewhat arched eyebrow forms. Turn the top of the toy inside out, and stitch these eyebrow stitches together thus securing the "ridge" so that wear and handling of the toy will not break it up. Fasten off.
Second Eyebrow-
Thread a needle with Cafe, and stitch inside the white area of the eye patch, embroider an eyebrow. Fasten off.
Tail- With Warm Brown, ch 2.
Rnd 1- 8 sc in 2nd ch from hook, sl st to join rnd. Rnd 2- 2 sc in each sc around. Rnds 3 to 8- 1 sc in each sc around. Fasten off, leaving long tail to sew with.
Stuff lightly. Measure to center in the back of Baxter's body. Pin and sew in place. Fasten off.
Legs- With Soft and H hook, ch 2. Rnd 1- Make 6 sc in 2nd ch from hook, slip st to close rnd. Rnd 2- Make 2 sc in each sc around.
Rnd 3- 1 sc in each of first 2 sc, 2 sc in next sc, rep around. Rnds 4 to 7-1 sc in each of first 3 sc, 2 sc in next sc, rep around.
Rnds 8 to 10- Make 1 sc in each sc around. Rnds 11 to 13- Make 1 sc in each sc around. Fastn off, leaving long tail to sew with. Stuff legs with Fiberfill and sew to bottom of body as seen in photos. Arms- With Soft Brown, and H hook, Ch 2. Rnd 1- Make 6 sc in 2nd ch from hook, slip st to close round. Rnd 2- Make 2 sc in each sc around.
Rnd 3- Make 1 sc in each of first 2 sc, 2 sc in next sc, rep around. Rnd 4- Make 1 sc in each of first 3 sc, 2 sc in next sc, rep around. Fasten off.
Rnd 5- Make 1 sc in each sc around. Rnds 6 to 11- Join Gold. Make 1 sc in each sc around. Fasten off, leaving long tail to sew with. Stuff arms and attach to body as seen in photos (about half way down to give some room to fluffy ears).
Stuff legs and sew in place. Fasten off. Stuff arms and sew in place. Fasten off.
Ears- (Make 4 pieces)- First 2 pieces- With Soft Brown, ch 3. Row 1- 1 sc in 2nd ch from hk, ch 2, turn. Row 2- 1 sc in 2nd ch from hook and in each ch across, ch 2, turn.
Rows 3 to 9- Rep row 2. Fasten off, leaving long tail to sew with.
Second 2 pieces- Repeat what you did for the first two pieces, but this time use Gold yarn.
Sew one Soft Brown piece to a Gold piece together, to make each ear.
As you are getting ready to sew ears tohead, stitch across ear, gathering a bit as you go to make the ear fit on the side of the head. Pin each ear in place and sew, one with Gold facing upwards and the other with Soft Brown facing upwards.
Stuff Baxter's body and sew top. Fasten off. Place ears at the sides of the head as seen in photos, pin down and sew in place. Fasten off.

You're done!
Not only do you have a pretty cute doggy, but you have learned how to make sculptured cheeks for your Amis!

Muzzle revised Nov. 2011.
.................
Online Bible Courses, No Obligation

Funmigurumi Poochie Dog No. 5: Lollipop

Best Blog Tips


Okay, with a face like that one, who needs a lengthy introduction? Meet Lollipop, her big eyes, loopy ears, fluffy tail and candy colors make her a fun Ami to make and to share!
If you follow my style of making these toys (putting them together even as you crochet the different parts) you'll be done in no time at all. So, go ahead, make yourself a Lollipop!
Materials:

Red Heart worsted weight yarn Burgundy
Red Heart worsted weight yarn Hot Red
Red Heart worsted weight yarn Claret
Red Heart worsted weight Cherry Red
Red Heart worsted weight Black (scraps)
Red Heart worsted weight yarn Soft Brown (scraps)
Red Heart worsted weight yarn White (scraps)
Crochet size H hook
Fiberfill
Scissors
Blunt needle
cardboard or ruler
Pins
measuring tape
Special Stitch: Loop Stitch- I find loop stitch easier to make with a piece of cardboard or a ruler.
You proceed as follows: With a ruler, measure a piece of cardboard 2 inches wide by 4 or 5 inches long.
Cut. And use it to make the loop stitch. To make the loop stitch, you wrap the yarn from front to back around the cardboard, while holding it in place, insert the hook in stitch you are about to make, going behind the cardboard and under the loop you are holding, pull up a loop and complete sc as usual, drop the loop from the cardboard.
There are other ways of making the loop stitch using your fingers, use the method that is easier for you.

Body- (Make 2): With Burgundy, ch 31. Row 1- 1 sc in third ch from hook and in each ch across (31 sc). Ch 1, turn. Row 2- 1 sc in each sc across.
Ch 1, turn. Row 3 to 15- Rep row 2. Fasten off, leaving long tail to sew with.
Row 16- Join Hot Red. Make 1 sc in each sc across. Ch 1, turn. Rows 17 to 30- Rep row 16. Fasten off, leaving long tail to sew with.
Place both right sides of body facing, sew sides and bottom, leaving top open. Fasten off.
Legs- With Claret and H hook, ch 2. Rnd 1- Make 6 sc in 2nd ch from hook, slip st to close rnd. Rnd 2- Make 2 sc in each sc around.
Rnd 3- 1 sc in each of first 2 sc, 2 sc in next sc, rep around. Rnds 4 to 7-1 sc in each of first 3 sc, 2 sc in next sc, rep around.
Rnds 8 to 10- Make 1 sc in each sc around. Fasten off. Rnds 11 to 13- Join Burgundy. Make 1 sc in each sc around. Fastn off, leaving long tail to sew with. Stuff legs with Fiberfill and sew to bottom of body as seen in photos.
Arms- With Cherry Red, and H hook, Ch 2. Rnd 1- Make 6 sc in 2nd ch from hook, slip st to close round. Rnd 2- Make 2 sc in each sc around.
Rnd 3- Make 1 sc in each of first 2 sc, 2 sc in next sc, rep around. Rnd 4- Make 1 sc in each of first 3 sc, 2 sc in next sc, rep around. Fasten off.
Rnd 5- Join Hot Red. Make 1 sc in each sc around. Rnds 6 to 11- Make 1 sc in each sc around. Fasten off, leaving long tail to sew with. Stuff arms and attach to body as seen in photos (about half way down to give some room to fluffy ears).
Stuff legs and sew in place. Fasten off. Stuff arms and sew in place. Fasten off.
Muzzle- With Cherry Red, ch 6.
Row 1- 1 sc in 3rd ch from hook and in each ch across. Ch 1, turn. Row 2- 2 sc in first sc, 1 sc in each sc across till you reach last sc, 2 sc in that sc. Turn around and make 2 sc in first loop of froundation chain, 1 sc in each of next 3 sc, 2 sc in last loop of foundation chain. Sl st to join into a round. Rnd 3- 2 sc in first sc, 1 sc in each of next 2 sc, *2 sc in next sc, 1 sc in each of next 2 sc, rep from *around. Rnd 4- 1 sc in each of first 3 sc, 2 sc in next sc, *1 sc in each of next 3 sc, 2 sc in next sc, rep from * around. Rnd 5- 1 sc in each of first 4 sc, 2 sc in next sc, *1 sc in each of next 4 sc, 2 sc in next sc, rep from * around. Rnd 6- 1 sc in each of first 5 sc, 2 sc in next sc, *1 sc in each of
next 5 sc, 2 sc in next sc, rep from * around. End round with 1 sc in each of last 4 sc. Fasten off, leaving a long tail to sew with.
Nose-With Black, ch 6. Row 1- 1 sc in 3rd ch from hook and in each chain across. Ch 1, turn. Row 2- 1 sc in each sc across. Ch 1, turn. Row 3-1 sc in each sc across. Fasten off, leaving long tail to sew with. Pin nose to center of muzzle, sew in place. Embroider mouth as seen in photos.
Measure body to center muzzle. Stuff, pin in place and sew. Fasten off.
Eyes- (Make 2): With Black, ch 2. Rnd 1- Make 6 sc in 2nd ch from hook, sl st to join rnd. Fasten off. Rnd 2- Join Soft Brown. Working in back loops only, make 2 sc in first sc, 2 sc in next sc, 2 sc in next sc, sl st in next sc. Fasten off. Rnd 3- Join White. Working on back loops only,make 2 sc in first sc, 1 sc in next sc, 2 sc in next sc, 1 sc in each of next 2 sc, sl st in next sc. Fasten off. Pin eyes in place as seen in photos and sew. Fasten off.
Eyelids and eyelashes- With Cherry Red, ch 7. Row 1- 1 sc in 3rd ch from hook and in each ch across. Ch 1, turn. Row 2- 1 sc in each sc across. Fasten off, leaving long tail to sew with. Pin in place above eyes as seen in photos, sew. Optional- Eyelashes: Thread a blund needle with Black, embroider under eyelids and make long stitched lashes on the corner of the eyelids as seen in photos.
Ears- (Front--Make 2): With Claret, ch 13. Row 1- 1 sc in third ch from hook and in each
ch across (12 sc). Row 2- Ch 1, make 1 loop stitch, make 1 loop stitch in each sc across (12 loop sts). Fasten off. Join Burgundy. Rows 3 to 4- 1 loop stitch in each stitch across. Fasten off. Row 5- Join Cherry Red. Make 1 loop stitch in each stitch across.
Fasten off. Join Hot Red. Row 6- Make 1 loop stitch in each st across. Row 7- Sc 2 tog over first 2 sc, 1 sc in each sc till you reach the last two, sc2tog over the last 2 sc. Row 8- 1 loop st in each sc
across. Row 9- sc2tog over first 2 sc, 1 sc in each sc across till you reach last 2 sc, sc2tog over last 2 sc (7 sc).
Row 10- 1 loop st in each st across. Rows 11 to 12- Rep row 10. Fasten off.
Back- With Hot Red, ch 13. Row 1- 1 sc in third sc ch from hook and in each ch across (12 sc). Ch 1, turn. Row 2- 1 sc in each sc across. Rows 3 to 7- 1 sc in each sc across. Row 8- Sc2tog over first 2 sc, 1 sc in each sc till you reach last 2 sc, sc2tog over last 2 sc. Row 9- 1 sc in each sc across. Row 10- sc2tog over first 2 sc, 1 sc in each sc till you reach
last 2 sc, sc2tog over last 2 sc. Rows 11 to 12- 1 sc in each sc across. Fasten off.
Put together 1 loopy side and 1 plain sc side and sew together,leaving top open. Repeat with other ear.
Tail- With Claret, ch 2. Rnd 1- 6 sc in 2nd ch from hook, sl st to join rnd. Rnd 2- Make 1 loop st in each sc around.
Rnd 3- 1 sc in each sc around. Rnd 4- 1 loop st in each sc around. Rnd 5- Make 1 sc in each sc around. Rnd 6- 1 loop st in each st around.
Rnd 7- 1 loop st in each st around. Fasten off. Join Hot Red. Rnd 8- With Hot red, make 1 loop st in each st around. Fasten off. Join Burgundy. Rnds 9 to 10- With Burgundy, make 1 loop st in each st around. Fasten off, leaving long tail to sew with. Measure back and sew tail well centered. Optional- Stuff tail lightly.
Stuff body. Sew top. Fasten off. Sew ears in place. Fasten off.

Done!
Wasn't that easy?


Listen to this popular radio program FREE online!Bible Answers Live: Marriage and Parenting